-
Pre-treatment image. Severe toothache due to large cavity and resultant bacterial infection of pulp chamber
Root Canal Treatment, step by step
Next Gallery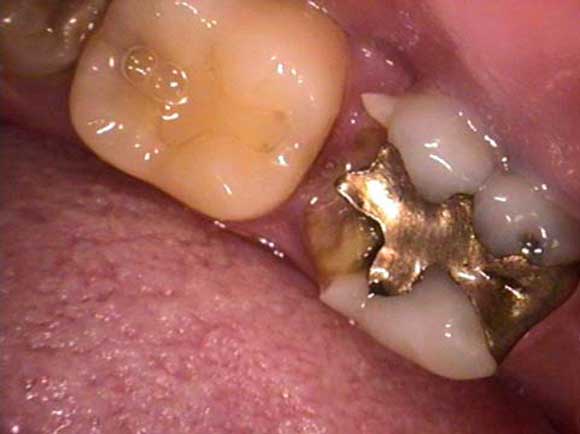 Previous Gallery
-
Rubber dam application
Root Canal Treatment, step by step
Next Gallery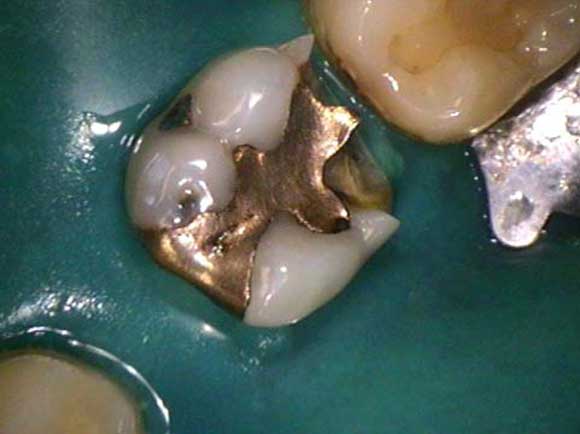 Previous Gallery
 -
X-ray of large cavity and infected tooth
Root Canal Treatment, step by step
Next Gallery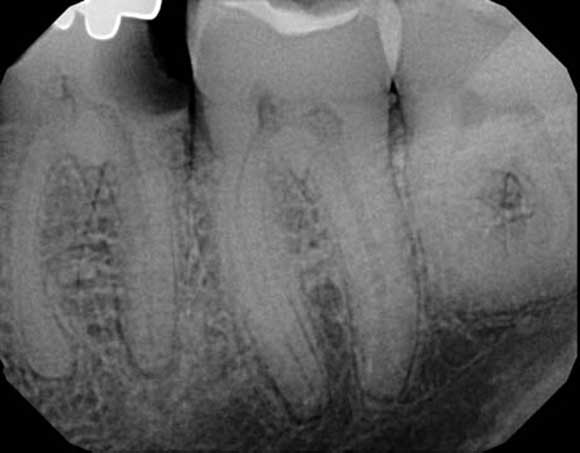 Previous Gallery
 -
Initial access to pulp chamber revealing mostly necrotic pulpal tissue
Root Canal Treatment, step by step
Next Gallery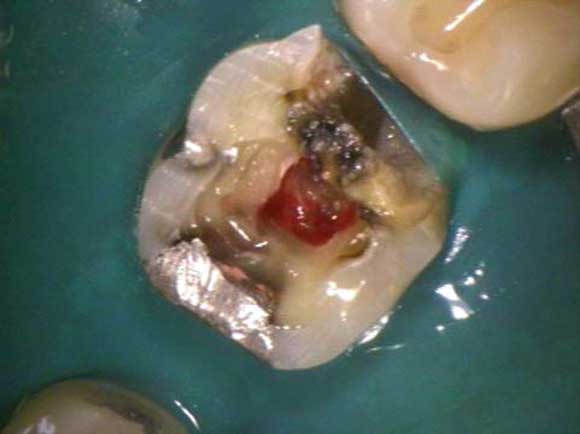 Previous Gallery
 -
Identification, enlargement and cleansing of root canals
Root Canal Treatment, step by step
Next Gallery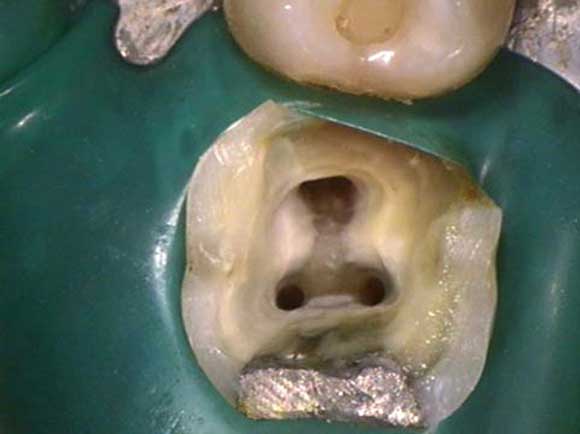 Previous Gallery
 -
Placement of initial root canal filling material
Root Canal Treatment, step by step
Next Gallery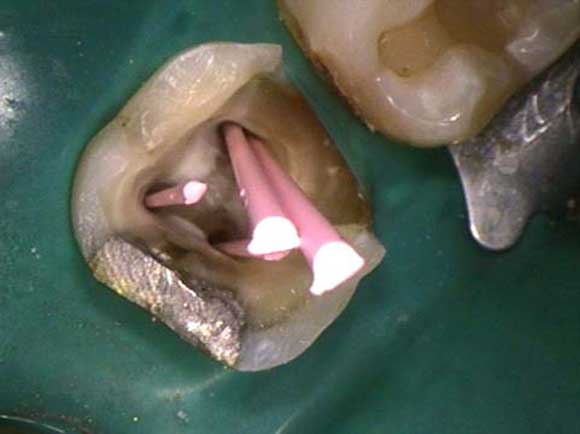 Previous Gallery
 -
X-ray of initial root canal filling material in place to ensure all roots have been cleansed to their anatomical end and all root curvatures have been negotiated
Root Canal Treatment, step by step
Next Gallery Previous Gallery
 -
Completed placement of root canal filling material and initial cleaning of coronal tooth structure
Root Canal Treatment, step by step
Next Gallery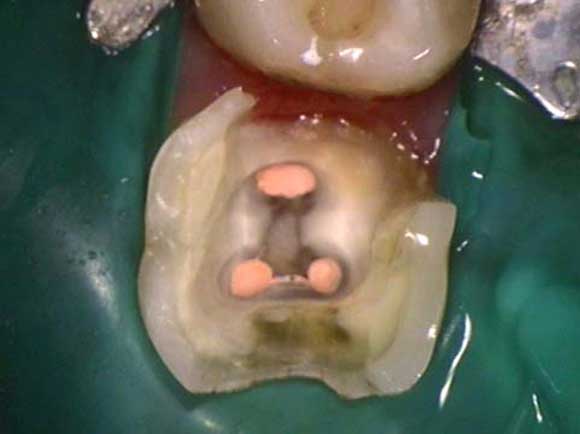 Previous Gallery
 -
Blue decay / cavity detection dye applied to tooth
Root Canal Treatment, step by step
Next Gallery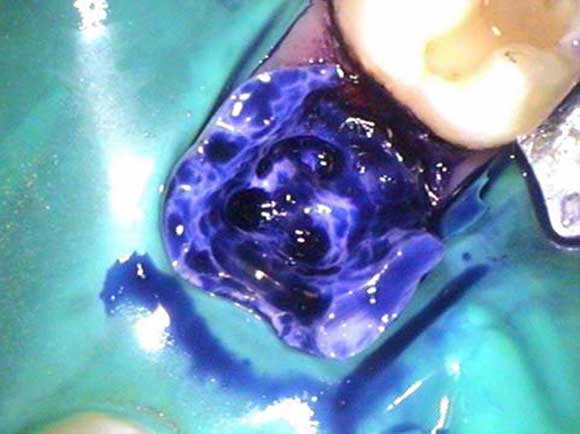 Previous Gallery
 -
Dye is washed away and blue dye adheres to where decay remains
Root Canal Treatment, step by step
Next Gallery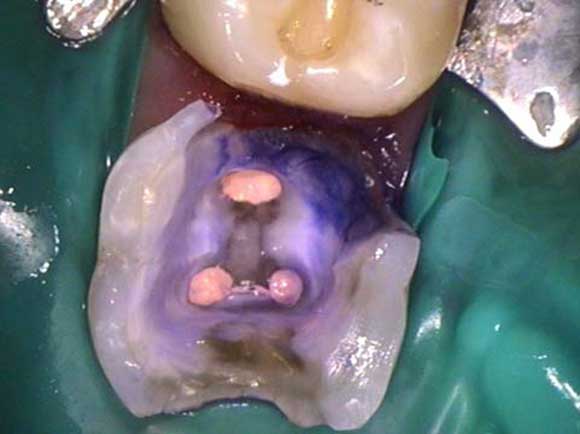 Previous Gallery
 -
Completed decay removal
Root Canal Treatment, step by step
Next Gallery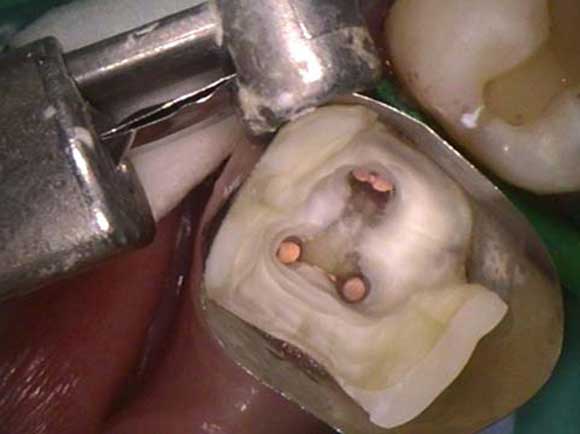 Previous Gallery
 -
Completed new tooth coloured filling
Root Canal Treatment, step by step
Next Gallery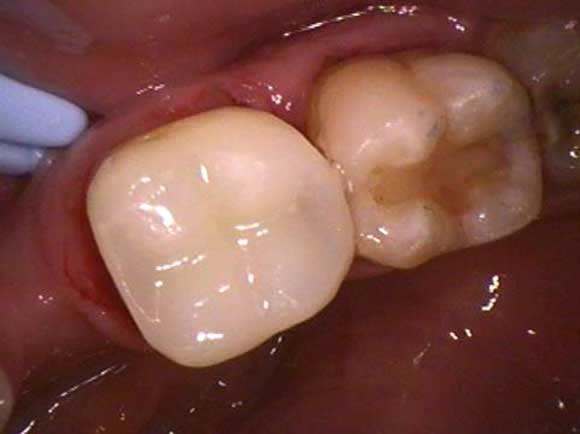 Previous Gallery
 -
X-ray of completed root canal treatment and permanent filling
Root Canal Treatment, step by step
Next Gallery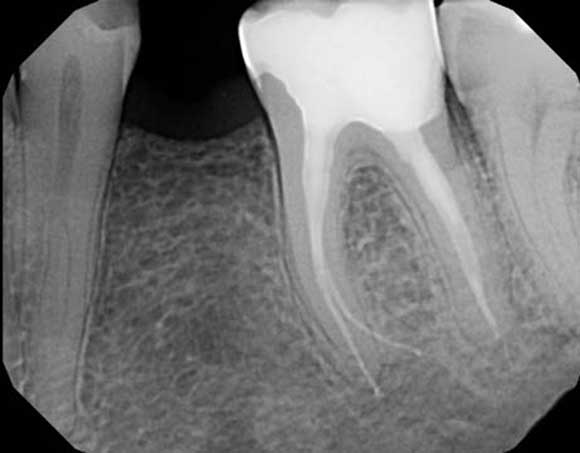 Previous Gallery
 Previous Gallery
  Previous Gallery
  Previous Gallery
  Previous Gallery
  Previous Gallery
  Previous Gallery
  Previous Gallery
  Previous Gallery
  Previous Gallery
  Previous Gallery
  Previous Gallery
  Previous Gallery
  Previous Gallery